
Details, Tips and Tricks for completing your kit like a Pro.
Step 1: Paint background using a bristle chip paint brush. **IMPORTANT: LESS IS BEST*** For best results, paint LIGHTLY. If your kit has a frame, see below.
STEP 2: When background is COMPLETELY DRY, stencil is ready to be applied. NOTE: If painted background feels cold like chalk, it is NOT ready. Continue to wait to dry, a hair dryer may be used to speed up the process.

APPLYING THE STENCIL: There are 3 layers to the stencil. Turn stencil upside down on a flat surface. Peel off the back layer (white or blue). Press stencil down onto board firmly using a credit card or something hard like a Pampered Chef scraper.
STEP 3: Carefully, peel off the top clear layer. Press down again, pushing into seams or gaps in the wood.
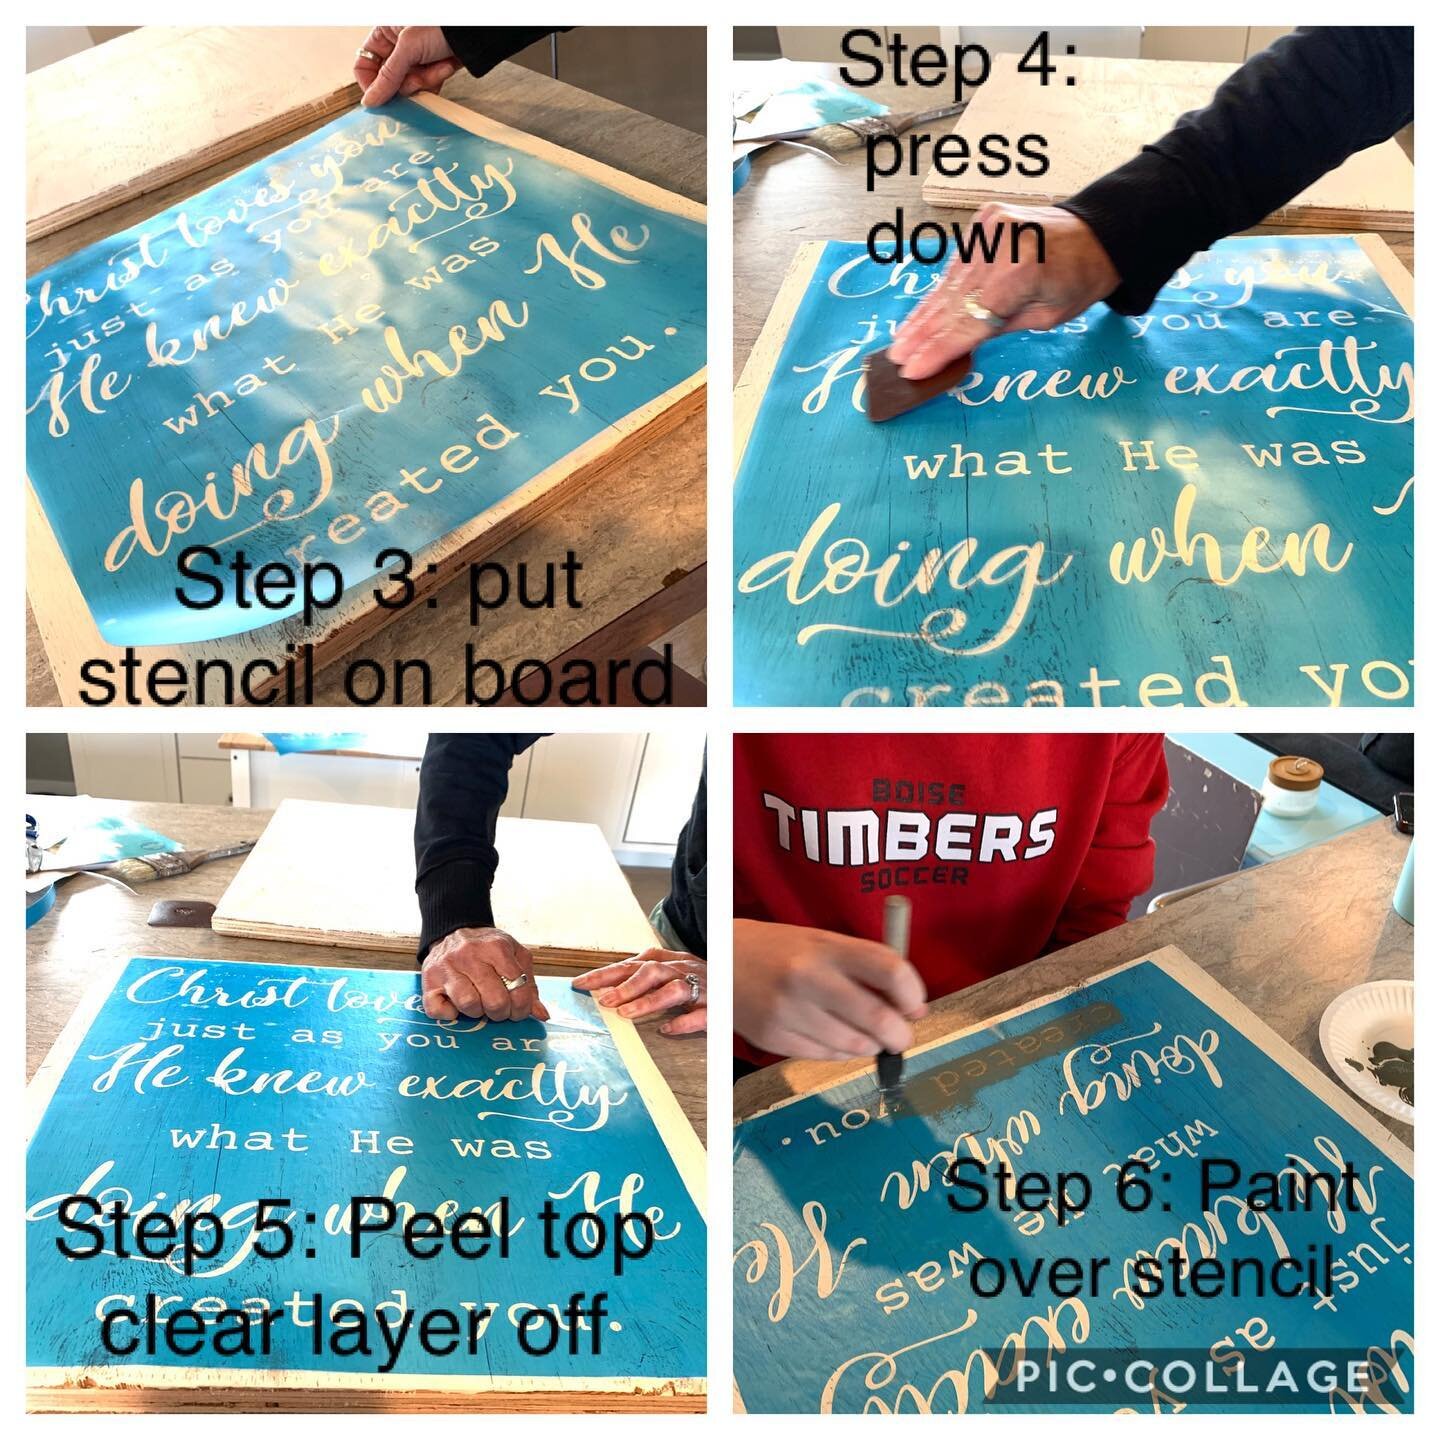
STEP 4: You are ready to paint over the stencil using a foam brush. Again, LESS IS BEST!!! Resist the urge to push paint into push into creases as paint will puddle under the stencil. You may peel the stencil off when finished. Do NOT allow painted stencil to sit for too long, or peeling may occur. If working on a board with deep grooves, resist the urge to push paint into the grooves or bleeding may occur under the stencil. If re-using a brush, make sure to dry the brush completely or paint will run.
